Not sure what kind of paint to use on mugs? This post lists the best tips on how to paint mugs at home.
Painting your own mug is super easy and fun. Hand painted coffee mugs make great personalized gifts for friends and family. Painting mugs is a fun, creative craft for both kids and adults!
This article will teach you the best techniques how to paint coffee mugs permanently so the design won’t wash away or crack over time. Using the right paints and methods, you can create your own custom dishwasher safe coffee mug!
Whether you are painting on glazed ceramic mugs, glass mugs, or porcelain mugs, I’ve got you covered! Let’s get started!
I may earn a small commission for purchases made through links in this post at no cost to you. Thank you for supporting Frugal Home Addict! Learn more about my disclaimer policy here.
How To Paint Mugs
Painting your mugs is a great way to personalize them and give them a special touch. Before painting, it’s important to clean the mug with soap and water to remove any dirt or oils. Rinse it thoroughly with water and allow it to dry completely before proceeding. This will help the paint adhere better to the surface of the mug.
Not every paint is the same. Some paints stick better on different types of materials (glazed ceramic, glass, porcelain, etc.), so it’s important to select right product. Below, I’ve listed helpful tips on how to determine what kind of paint to use for your mug.
What Type Of Paint Should You Use On Mugs?
Below, I’ve listed three popular mug materials and what kind of paint to use for each one. All the paints recommended are dishwasher safe and won’t wash away (after baking)!
Unglazed + Glazed Ceramic Mugs
One of the most popular types of mugs at home are ceramic cups. This is because ceramic mugs are affordable, durable, easy to clean, and microwave and dishwasher safe.
Acrylic paint pens, acrylic paint, and Sharpie markers should adhere well on both unglazed and glazed ceramic mugs. If you want your artwork to look smooth and glossy like glazed ceramics, I recommend using porcelain paint.
Glass Mugs
Glass is another popular material for mugs. If you are painting glass mugs, make sure they are oven safe before baking. The last thing you want is glass shattering in your oven!
Similar to ceramic, acrylic paint pens, acrylic paint, Sharpie markers, and porcelain paint work well on glass surfaces. You might need to layer additional coats of paint to get a full coverage, opaque finish.
Porcelain Coffee Mugs
Porcelain mugs are a beautiful and fancy way to serve your morning coffee or tea. These mugs are daintier and look nicer compared to standard ceramic and glass mugs.
For porcelain coffee mugs, I recommend using a special porcelain paint. Porcelain paint mimics the appearance of glazed ceramics, making your mug look expensive and attractive. Before painting, make sure your porcelain mug is oven-safe for baking.
Now that you’ve selected the best paint to use, here’s a step-by-step on how to paint mugs with each type of paint!
Best Products To Paint Mugs
1. Acrylic Paint Pens
Not sure what kind of paint to use on your mug? Acrylic paint pens are the easiest way to paint mugs and create intricate designs. They are perfect for beginners and can be used on a variety of surfaces. You can use them on both glazed ceramic and glass mugs.

Paint pens are a great way to paint mugs without the mess of using brushes. They’re also more forgiving if you make a mistake (you can erase the ink with a q-tip swab and a small amount of rubbing alcohol). If you’re new to painting with acrylics, this is the best starting point.
For painting on mugs, I recommend using these acrylic paint pens from Supkiz. After baking, you’ll get a beautiful customized mug that is dishwasher safe and won’t wash away! Here’s how to paint mugs at home with acrylic paint pens!
How To Paint Mugs With Acrylic Paint Pens
- Wash the mug with dish soap and dry completely. Place newspapers under the coffee mug to protect surfaces.
- To begin, draw a light outline of your design with a pencil.
- Using an acrylic paint pen, trace and paint your design. Allow the ink to dry completely before painting a new color or coat. Add more layers of paint as needed.
- Air dry the mug for at least an hour before placing it in the oven. Place the coffee mug on a baking sheet and bake it in the oven at 350°F. After 30 minutes, turn off the oven, but keep the mug inside for at least 2 hours.
- Allow the mug to cool. Don’t wash the mug until 72 hours after baking to prevent paint from washing off. Hand wash the mug with dish soap.
2. Acrylic Paint
Acrylic paint is a versatile medium that can be used to paint unglazed ceramic and glass mugs. If you are looking for a quick and easy way to make your own custom coffee cup, then acrylic paints are just what you need.
Acrylic paints are non-toxic and water based, which makes them easy to clean up, fast drying, and safe to use. These paints are easy to use and can be applied with a regular paint brush.
After baking acrylic paint, it bonds well onto mugs and won’t wash away. You won’t need to use an additional sealant to prevent the paint from cracking and peeling. Baking the acrylic paint also allows it to seal onto the coffee mug, making it dishwasher safe.
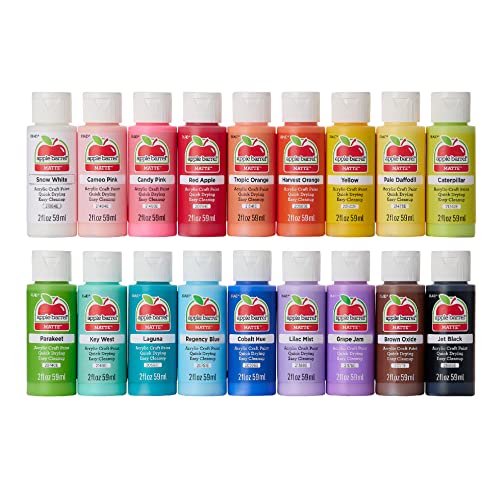
If you are looking for a budget set of paints for mugs, I recommend using this Acrylic Paint Set from Apple Barrel. This quality acrylic paint set has 18 vibrant colors for under $20!
Here’s how to paint coffee mugs permanently at home with acrylic paint.
How To Paint + Bake Acrylic Paint On Mugs
- Clean the mug with dish soap and dry it completely before starting. Place newspapers under the coffee mug to catch any spills.
- To begin, draw a light outline of your design on your coffee mug with a pencil.
- Using a paint brush, trace and paint your design with acrylic paint. Allow the paint to dry completely before adding a new coat or color.
- Air dry the mug for at least 24 hours before placing it in the oven. Place the coffee mug on a baking sheet and bake it in the oven at 350°F for 30 minutes.
- Allow the mug to cool. Don’t wash the mug until 72 hours after baking to prevent paint from washing off. Hand wash the mug with dish soap.
3. Sharpie Markers
If you plan to use Sharpie products to paint on mugs, I highly recommend using Sharpie Oil-Based Paint Markers. These markers come in many colors, are affordable, and have a permanent finish. You can use Sharpie markers to paint glazed ceramic mugs and glass mugs.

These Sharpie Paint Markers are perfect for painting coffee mugs because the ink is water-resistant and won’t wash away easily. To create a painted mug that will last forever, I highly recommend baking your finished mug in the oven to safely seal it.
After baking, your Sharpie Paint Marker mug designs should be dishwasher safe and won’t wash away with regular use. Here’s how to paint mugs at home with Sharpie.
How To Paint Mugs With Sharpie
- Wash and dry your mug.
- Using a pencil, lightly sketch your design on the coffee mug.
- Using Sharpie markers, trace and color your design. Allow the ink to dry completely before adding a new color or coat.
- Air dry the mug for at least an hour before placing it in the oven. Place the coffee mug on a baking sheet and bake in the oven at 350°F. After 30 minutes, turn off the oven, but keep the mug inside for at least 2 hours.
- Allow the mug to cool. Don’t wash the mug until 72 hours after baking to prevent paint from washing off. Hand wash the mug with dish soap.
4. Porcelain Paint
Porcelain paint is a water-based paint that can be used to decorate ceramic surfaces like plates, mugs and cup. It’s also perfect for painting tile, stone, glass, metal, and many other types of materials. After baking, these paints are permanent, microwave and dishwasher safe, and UV resistant.
If you are looking for a permanent solution for painted mugs, porcelain paint is the best option. Once baked, this paint will last for years without chipping or peeling. Porcelain paint will give your mug a beautiful enameled finish that is smooth and glossy, and mimics the appearance of glazed ceramics.

For painting mugs, I recommend using this Porcelaine 150 China Paint Set by Pebeo. This paint set comes with 10 vibrant colors and is super easy to use. Here’s how to paint coffee mugs permanently at home with porcelain paint.
How To Paint Coffee Mugs Permanently With Porcelain Paint
- Before painting, wash your coffee mug with dish soap and dry completely. Place newspapers under the mug to catch any spills.
- Lightly sketch your design on the coffee mug with a pencil.
- Before applying, stir the paint. Using a paint brush, carefully trace and color the mug with porcelain paint. Allow the paint to dry completely before add a new coat or color.
- After drying for 24 hours, place the mug on a baking sheet and preheat the oven for 300°F. Bake for 35 minutes (follow manufacturer’s instructions for best results).
- Allow the mug to cool. Don’t wash the mug until 72 hours after baking. Before using, hand wash or clean the mug in the dishwasher.
Summarized: How To Paint Mugs
This post lists several tips and techniques on how to paint mugs at home. Here are all the recommended products in one convenient list:
- Best Non-Toxic Acrylic Paint Pens For Mugs: Supkiz Acrylic Paint Markers Set
- Best Budget Acrylic Paint Set For Mugs: Apple Barrel Acrylic Paint Set
- Best Sharpie For Painting Mugs: Sharpie Oil-Based Paint Markers
- Overall Best Product For Painting Mugs: Pebeo Porcelaine 150 China Paint Set
Conclusion
In this post, I’ve taught you four methods on how to paint mugs. Painting mugs is a great way to express your creativity and give your morning coffee mug a personal touch. It is also a great craft to spend time with your kids.
With the right paint and techniques, it’s possible to paint mugs permanently. After painting, I recommend baking your creation to ensure the design is properly seal on your mug. Baking is super easy to do and makes your decorated mugs dishwasher safe.
I hope this post gave you some helpful tips on how to paint coffee mugs permanently at home. If you still aren’t sure what kind of paint to use, I recommend starting off with acrylic paint pens. Good luck!