Rock painting is a popular hobby for both children and adults. It is an excellent creative activity to make something beautiful for your home or garden.
Using the right tools and techniques, painting rocks is not too difficult. In this post, I’ve gathered the best tips on how to paint a rock for outside and indoor use. Below, I’ve covered the process of choosing the best rocks, preparing them for painting, and painting and sealing them.
Without further ado, here’s how to paint rocks for beginners!
I may earn a small commission for purchases made through links in this post at no cost to you. Thank you for supporting Frugal Home Addict! Learn more about my disclaimer policy here.
Selecting Rocks For Painting
In this post, I’ve gathered several tips on how to paint rocks for beginners. For best results, it is important to select the best rocks for painting. Look for rocks that are flat, smooth, and free of cracks or chips.
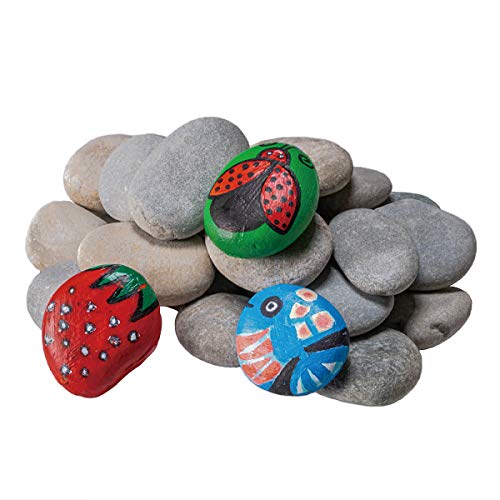
River rocks are popular choices for rock painting and have a natural, flat, oval shape. They also vary in size, so you can easily find small or large rocks that best fit your project. You can purchase river rocks online or at your local craft store or garden center.
Once you have selected your rock, the first step is to clean and prepare it for painting. Wash dirty rocks thoroughly with dish soap and water. If your chosen stone is rough, make sure to sandpaper it (use an 80 grit sandpaper) to create a smooth surface to paint on.
Note: Since river rocks are slightly porous, I recommend sealing your stone with an acrylic sealer before painting. This will help prevent your rock from absorbing the paint.
How To Select + Prep A Rock For Painting
- Select a rock that is flat, smooth, and without cracks or chips.
- Clean your rock thoroughly with dish soap and water to remove any dirt. Make sure the stone is completely dry before sealing or painting.
- Optional: If your rock is rough, use an 80 grit sandpaper to smooth down its surface. After polishing, wash your stone once more.
- When the rock is clean and dry, seal its surface with an acrylic sealer. Make sure the coating is completely dry before painting.
How To Paint A Rock
1. Paint Pens
Looking for tips on how to paint a rock? Paint pens are an easy and quick way to paint rocks. They’re easy to use, not as messy as traditional paints, and similar to regular markers.
Paint pens are a great way for beginners to start painting. The ink is fast-drying and easy to clean, and you can use them on both light and dark surfaces. To create painted rocks for outside, just seal the ink with an acrylic sealer after painting!
The only downside to these pens is that you can’t mix the paint to create custom colors. Otherwise, paint pens are a great way to create detailed artworks without the mess. It’s the perfect painting tool for both adults and kids!
For painting rocks, I highly recommend checking out this budget Paint Pen set from Artistro. This product comes with 12 vibrant colors and has excellent quality for the cost! It’s also non-toxic and odor free!
How To Paint A Rock With Paint Pens
- Place newspapers under the rock to protect your work surface. Make sure your rock is clean, sealed, and dry before painting. Optional: For more vibrant-looking colors, prime the rock with white paint.
- To activate new paint pens, shake the pens for a minute and then remove the lid. Press the tip on a piece of paper until the ink starts to flow.
- Carefully outline your artwork with a paint pen on the stone. For best results, paint in gentle, even strokes.
- Using small circles, fill in the outline once the ink is dry. Make sure the paint has dried completely before adding an additional coat or using a new color.
- When you are finished painting, allow your stone to dry completely before handling. To make your rock safe for outdoor use, seal it with an acrylic sealer.

2. Acrylic Paint
Looking for more tips on how to paint rocks for beginners? Acrylic paint is a water-based, fast-drying paint that can be used on a variety of surfaces. It is great for beginners because it is easy to use and can be washed off with soap and water when wet.
Acrylic paint is great for painting large areas, but can also be used to add fine details. These paints are also inexpensive, making them ideal for beginners who want to try rock painting. To waterproof your rock for outdoors, simply apply an acrylic sealer after painting!
Want to make sparkly designs on your rock? Learn how to make shiny paint from this post.
I highly recommend checking out this massive 24 Acrylic Paint Set from Kolor Kingdom. For under $15, you get a large selection of vibrant, quality acrylic paints. The paint is extremely pigmented, blends well, and has nice smooth consistency. This is an excellent budget paint set for rock painting!
How To Paint Rocks With Acrylic Paint
- Place newspapers under the rock to protect your work surface. Make sure your rock is clean, sealed, and dry before painting. For cleaning and drying paint brushes between colors, keep a water cup and paper towels nearby. Optional: For more vibrant-looking colors, prime the rock with white paint.
- Using a paint pen, carefully outline your artwork on the stone. Allow the ink to dry completely before filling it in with acrylic paint.
- If desired, blend acrylic paints together to create custom colors. Using a clean paint brush, apply a thin, even layer of acrylic paint on your rock. Allow the paint to dry completely before adding an additional coat or using a new color. Clean and dry your paint brush between colors.
- When you are finished painting, allow your stone to dry completely before handling. To make your rock safe for outdoor use, seal it with an acrylic sealer.

3. Acrylic Paint For Outdoors
Not sure how to paint a rock for outdoor use? Outdoor acrylic paints are water-based paints that don’t require acrylic sealers. They are designed for outdoor projects and are able to withstand extreme weather conditions, such as rain and snow.
Outdoor acrylic paints are a great way to paint small and large rocks to place in your garden or outside. These paints are waterproof, UV-resistant, and don’t crack or peel off when exposed to high temperatures or humid conditions.
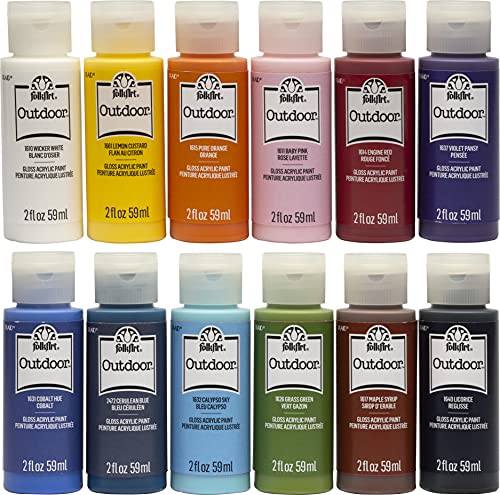
For rock painting, I highly recommend checking out this Outdoor Acrylic Paint Set from FolkArt. These acrylic paints come in a pack of 12 and are formulated specifically for outdoor use.
Once dry, the paint has a durable, weather-resistant, UV stable, and satin finish. Although more expensive than traditional acrylics, this product guarantees that your outside rock creations will look vibrant for years to come!
How To Paint A Rock With Outdoor Acrylic Paint
- Place newspapers under the rock to protect your work surface. Make sure your rock is clean, sealed, and dry before painting. For cleaning and drying paint brushes between colors, keep a water cup and paper towels nearby. Optional: For more vibrant-looking colors, prime the rock with white paint.
- Using a paint pen, carefully outline your artwork on the stone. Allow the ink to dry completely before filling it in with outdoor acrylic paint.
- If desired, blend acrylic paints together to create custom colors. Using a clean paint brush, apply a thin, even layer of outdoor acrylic paint on your rock. Allow the paint to dry completely before adding an additional coat or using a new color. Clean and dry your paint brush between colors.
- When you are finished painting, allow your stone to dry completely before handling or placing outdoors. Optional: For extra protection, seal it with an acrylic sealer.
Sealing Painted Rocks For Outside Use
In this post, I’ve gathered several methods on how to paint rocks for beginners. If you are painting rocks for outdoors, I highly recommend using outdoor acrylic paints or applying an acrylic sealer after painting.
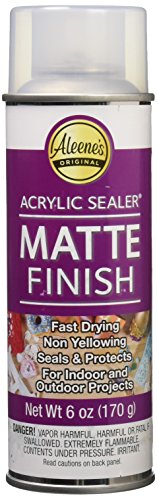
Aleene’s Matte Finish Acrylic Sealer is the perfect protective finish for outdoor painted rocks. This sealer dries clear and matte, giving your project an invisible, weatherproof coating. It’s a great product to preserve and extend the life your painted rocks outside!
Summarized: How To Paint A Rock
This post gathers the best tips on how to paint a rock for both indoor and outdoor use. Here are all the recommended products in one convenient list:
- Yeahome River Rocks
- Artistro Paint Pens
- Kolor Kingdom Acrylic Paint Set
- FolkArt Outdoor Acrylic Paint Set
- Aleene’s Matte Finish Acrylic Sealer
Conclusion
Painting rocks is an easy and fun activity that can be enjoyed by people of all ages. It’s a great hobby for people looking for something new to do in their spare time. In this post, I’ve gathered the best methods on how to paint rocks for beginners.
To create the best results, it’s important to properly select, clean, and seal rocks before painting them. If you want the paint to last longer on the rock, you should also use a spray sealant after painting.
Paint pens are the easiest, cleanest, and quickest way to paint rocks. They are great for beginners and kids. Acrylic paints are another a great choice and allow you to create unlimited custom colors.
To paint rocks for outside, I highly recommend using outdoor acrylic paints. These paints last much longer than paint pens and acrylic paints, and are also water resistant and UV protected. Outdoor acrylic paints are a great way to paint small and large rocks to place in your garden or outside.
I hope this post gave you some helpful tips on how to paint a rock for outdoors and indoors. Good luck!