Not sure how to fix slippery shoes? Slippery shoes are a common problem, especially in the wintertime. When people slip on the floor, this can lead to serious injuries such as broken bones, sprained ankles, or even head injuries.
Thankfully, there are many affordable and effective ways to fix slippery shoes at home. Using the right tools and a little bit of effort, it’s super easy to make the bottom of your shoes non-slip! In this post, I’ve gathered the best methods on how to make shoes not slippery.
Without further ado, here’s how to make shoes slip resistant!
I may earn a small commission for purchases made through links in this post at no cost to you. Thank you for supporting Frugal Home Addict! Learn more about my disclaimer policy here.
Best Products To Make Shoes Not Slippery
How To Fix Slippery Shoes
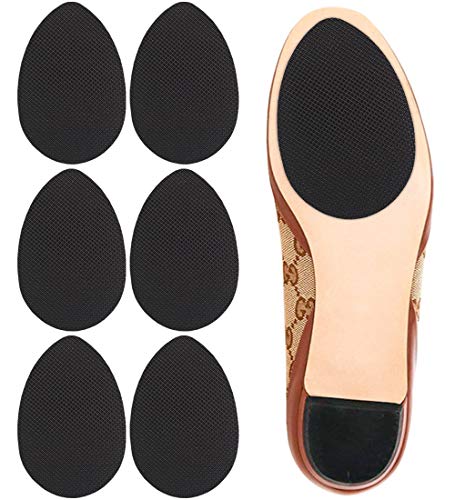
1. Anti-Slip Shoe Pads
Looking for tips on how to fix slippery shoes? Anti-slip shoe pads are a great way to make new shoes more slip resistant. These clever pads are attached to the bottom of your shoes to provide more traction, so you won’t slip on the floor.
Most non-slip pads have an adhesive backing for quick application. These pads are easy to install and can be placed on all types of shoes. For best results, make sure that the soles are clean and dry before adhering. I also recommend trimming the shoe pads with scissors for a better fit.
To make your shoes less slippery, I highly recommend using Dr. Shoesert’s Non-Slip Shoe Pads. These pads make the bottom of your shoes anti-slip and have a strong adhesive backing to stay securely in place. To use, simply remove the adhesive covering and firmly apply the pads to the bottom of clean and dry shoes.
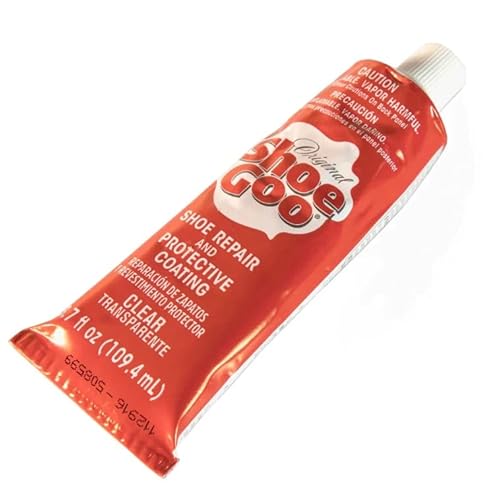
2. Shoe Goo
Not sure how to make shoes not slippery? Shoe Goo is a permanent shoe adhesive that can be used to make shoes slip resistant. It adds extra traction to surfaces and can be applied directly onto rubber soles to fix slippery shoes.
Shoe Goo can be used on leather, vinyl, rubber, and canvas surfaces. This versatile product forms a protective, clear coating and is great for discreet fixes. When dried, it turns into a waterproof, flexible rubber that won’t crack or break.
Shoe Goo is must have for shoe enthusiasts to repair damage and add grip to worn soles. It can be used to waterproof and fill in any gaps or cracks on the surface of your shoes. It’s also easy to use and cures within 24 to 72 hours of application!
Tip: For best results, make sure that the soles are clean and dry before applying Shoe Goo. Apply a thin layer and allow the adhesive to cure before using your shoes.
3. Rubber Outsoles
As your shoe soles get worn out, they lose their grip, causing you to slip on the floor easily. Replacement outsoles are a cost-effective solution to fix slippery shoes at home. These rubber soles are attached to the bottom of your shoes (with shoe glue) to improve traction.
To make your shoes less slippery, I highly recommend using these Shoe Replacement Outsoles from Kaneiji. These outsoles are 4 millimeters thick and fit US Mens 13 sized shoes and under. This product work best on flat shoes, but can be cut to fit most shoe types.
Replacement rubber outsoles are great way to extend the life of old, worn-out shoes and protect the soles from wear and tear. This is an inexpensive solution on how to make shoes slip resistant again!

4. 100-Grit Sandpaper
Looking for more tips on how to fix slippery shoes? New shoes can be slippery when the soles are too smooth and not yet broken in. To speed up this process, you can gently roughen up the bottom of your shoes with fine sandpaper (100-grit works great!).
To make shoes not slippery, try sanding the soles with 3M’s Pro Grade 100-Grit Sandpaper. This sandpaper comes in 9 x 11 inch sheets, can be used on most surfaces, and is perfect for detail sanding. It also has a special No-Slip Grip Backing that makes this product last 7 times longer than conventional sandpaper.
Lightly sanding down your shoe soles is a great way to add traction and make your shoes less slippery. It’s a quick and simple fix that will make new shoes more slip resistant and even reduce squeaking! Just make sure to sand gently to avoid wearing down the soles!

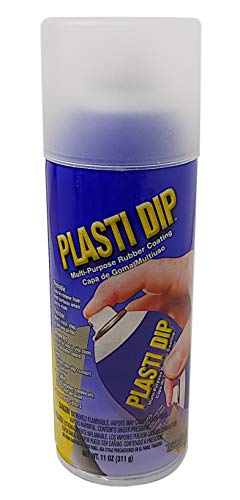
5. Plasti Dip
Plasti-Dip is a product that can be used to make shoes non-slip. It is a rubberized coating that can be applied to the soles of shoes for added traction. When dry, the coating is easy-to-peel for quick removal or reapplication.
To fix slippery shoes, I highly recommend using Plasti Dip’s Clear Rubber Coating. This product has a flexible, stretchy formula will not crack or become brittle in extreme weather conditions. Spray it on the bottom of high heels, sandals, dress shoes, boots, sneakers, and more!
For added traction, apply two coats of Plastic Dip onto rubber soles. After spraying the first coat, sprinkle a generous amount of pumice grit onto the Plasti Dip when it’s still wet. For best results, make sure that the soles are clean and dry before coating. This is a great hack on how to make shoes not slippery at home!
Note: Plasti Dip is not permanent and will wear down overtime. As the soles lose their anti-slip, apply more clear coating as needed.
6. Ice Cleats

Odier Ice Cleats | Amazon
Ice cleats are devices that attach to the bottom of shoes to provide traction on ice and snow. They generally have sharp claws, teeth, or spikes that dig into the ground to make your shoes less slippery. Ice cleats are a great solution for people who often walk outdoors during the winter.
To make your shoes slip-resistant on ice and snow, try using Odier’s Ice Cleats. This product is elastic, made of silicone, and securely attaches to the bottom of most shoes. These lightweight and durable ice cleats are great for low temperatures and outdoor activities! I recommend using them for improving grip when walking on heavy snow or icy sidewalks.
If you live in an area that snows during the colder seasons, this is a must-have shoe accessory. Ice cleats provide additional traction, increase stability, and reduce the risk of slipping and injury. This is great tip on how to make shoes slip resistant during the winter!

Summarized: How To Fix Slippery Shoes
In this post, I’ve gathered the best tips on how to fix slippery shoes. Here all the recommended products in one convenient list:
- Dr. Shoesert Non-Slip Shoe Pads
- Shoe Goo Repair Adhesive
- Kaneiji Shoe Replacement Outsoles
- 3M Pro Grade 100-Grit Sandpaper
- Plasti Dip Clear Rubber Coating
- Odier Ice Cleats
Conclusion
Looking for tips on how to make shoes not slippery? Slippery shoes are a common problem, especially in the wintertime. When people lose balance and fall, this can lead to serious injuries and accidents.
Thankfully, using the right tools and a little bit of effort, you can easily fix this problem at home. In this post, I’ve gathered the best methods on how to fix slippery shoes.
There are many ways to make shoes not slippery. However, the most effective way is by adding a layer of non-slip material on the bottom of shoes. This will provide your feet with more traction when walking on wet or slippery surfaces, which will help prevent accidents and injuries from happening.
Anti-slip shoe pads are the easiest way to make new shoes non-slip. These clever pads are directly attached to the rubber soles to provide more traction, so you won’t slip on the floor. They can be trimmed with scissors to fit all types of shoes such as high heels, sandals, dress shoes, boots, sneakers, and more!
For people who often walk outdoors during the winter, ice cleats are another great solution. Ice cleats are devices that attach to the bottom of shoes to provide traction on ice and snow. This must-have shoe accessory provides additional traction, increases stability, and reduces the risk of slipping and injury!
I hope this post gave you some helpful tips on how to make shoes slip resistant. For more shoe-related posts, check out the links below:
- Related: How To Stop Shoes From Creasing (6 Easy Ways)
- Related: How To Make Big Shoes Fit Smaller (8 Awesome Hacks)
- Related: How To Store Shoes Long Term (7 Epic Storage Ideas)
- Related: How To Keep Feet From Sliding Forward In Heels (5 Methods)
- Related: How To Glue Soles Back On Shoes: A Comprehensive Guide