Cross-stitching is a beloved hobby that many people enjoy. Whether you’re making a beautiful piece of art to hang in your home or crafting a special gift for a loved one, cross-stitching is a fun and rewarding activity.
I may earn a small commission for purchases made through links in this post at no cost to you. Thank you for supporting Frugal Home Addict! Learn more about my disclaimer policy here.
How To Wash Cross-Stitch
It’s important to properly clean and wash your yellowed cross-stitch projects to keep them looking their best. In this post, I’ve gathered the best tips for washing cross-stitch.
Without further ado, here’s how to clean cross-stitch!
Preparing The Cross-Stitch Project For Cleaning
Before you begin washing your cross-stitch project, you’ll need to prepare it properly. This involves checking the materials and colors used in the project, removing any dirt or debris, and securing any loose threads or beads.
Here’s how to prepare your yellowed cross-stitch project for cleaning:
1. Check The Materials And Colors Used In The Project
Before you wash your cross-stitch project, it’s important to check the materials and colors used in the project. Some embroidery flosses and fabrics may bleed or fade when washed, which can ruin your project.
To check if your floss or fabric will bleed or fade, take a small piece of white cloth and wet it with warm water. Rub the cloth on a small area of your project and see if any colors transfer onto the cloth. If the colors bleed or fade, you may need to take extra precautions when washing your project.
2. Remove Any Dirt Or Debris
Before washing your cross-stitch project, remove any dirt or debris that may be on it. Gently brush the project with a soft-bristled brush or use a lint roller to remove any loose dirt or dust. Be careful not to snag any threads or beads.
3. Secure Any Loose Threads Or Beads
Check your cross-stitch project for any loose threads or beads. Use a needle and thread to secure any loose threads and gently glue any loose beads back into place.
Now that your project is ready for washing, here’s a quick step-by-step how to clean cross-stitch by hand:
Hand Washing Cross-Stitch Projects
While some yellowed cross-stitch projects can be machine washed, others may require more delicate care. Hand washing cross-stitch is a great option for projects made with delicate fabrics or special threads.
Explanation Of The Hand Washing Process:
Hand washing involves washing the project in a basin or sink filled with water and gentle detergent, then gently agitating the project to remove dirt and stains. This method is gentler than machine washing and allows you to control the washing process more precisely.
Below, I’ve gathered the best technique on how to wash cross-stitch by hand:
Step-By-Step Instructions For Hand Washing A Cross-Stitch Project:
- Fill a clean basin or sink with lukewarm water. Avoid using hot water as it can cause the colors to fade or bleed.
- Add a small amount of gentle detergent to the water and mix well. Use a gentle, non-bleach detergent such as Soak Laundry Soap. Avoid using fabric softeners or bleach as they can damage the fibers and colors.
- Gently place the cross-stitch into the water, making sure it is fully submerged. Allow it to soak in the soapy water for 10-15 minutes.
- Gently agitate the cross-stitch in the water, being careful not to pull or stretch the fabric. Do not rub or scrub the project as it can damage the fibers and cause the colors to bleed.
- Drain the soapy water and refill the basin or sink with clean, lukewarm water. Rinse the project in the clean water, gently agitating it to remove any remaining soap. Repeat until the water runs clear and there is no more soap left.
- Gently squeeze the excess water out of the cross-stitch, being careful not to wring or twist the fabric. Lay the project flat on a clean towel and roll it up, pressing gently to remove any remaining water.
- Unroll the towel and lay the cross-stitch flat on another clean towel to dry. Avoid hanging the project to dry as this can cause it to stretch and lose its shape.
Best Detergent For Hand Washing Cross-Stitch: Soak Laundry Soap

Soak Wash is a popular choice among cross-stitchers due to its gentle formula. It’s specially designed to clean and refresh delicate fabrics, making it perfect for hand washing cross-stitch. The best part? Soak Wash requires no rinsing, so it’s incredibly convenient to use.
Tips For Drying The Project After Washing:
When drying your cross-stitch project, it’s important to take care to avoid damaging the fabric or thread.
Here are some tips to help you dry your project safely:
- Avoid drying your cross-stitch in direct sunlight, as this can cause the fabric and thread to fade.
- Don’t use a clothes dryer to dry the project, as the heat and tumbling can cause damage.
- If possible, lay the cross-stitch flat to dry on a clean, dry towel or blocking mat. Use pins to hold it in place and maintain its shape.
- If the project is made with wool or other delicate fibers, gently reshape it while it is still damp to help it maintain its shape as it dries.
- Allow the cross-stitch to air dry completely. This can take several hours or even overnight, depending on the size and thickness of fabric.
- Once the project is dry, you can iron it on the lowest heat setting to remove any remaining wrinkles, being careful not to iron over any metallic threads or embellishments.
Hand washing your cross-stitch project may take more time and effort than machine washing, but it can help preserve the beauty and integrity of the finished piece. By following these simple steps, you can ensure that your cross-stitch project will look its best for years to come.
Machine Washing Cross-Stitch Projects
While hand washing cross-stitch is the preferred method, machine washing can be a convenient option for those short on time. However, it’s important to approach machine washing with caution to prevent damage to your project.
Here’s how to wash cross-stitch using a washing machine:
Explanation Of The Machine Washing Process
Machine washing involves using a washing machine to clean your cross-stitch project. This process can be more efficient than hand washing but requires more care to prevent damage. It’s important to select the appropriate washing cycle and temperature to ensure your project stays intact.
Step-By-Step Instructions For Machine Washing A Cross-Stitch Project:
- Place your cross-stitch project in a mesh laundry bag to protect it from snagging or tangling.
- Use a gentle detergent that’s free of bleach and fabric softeners. Avoid using harsh detergents that can damage the fibers of your project.
- Select a delicate or hand wash cycle on your washing machine. This cycle will be more gentle on your project and help prevent damage.
- Choose cold water to prevent shrinkage and color bleeding. Hot water can cause the fibers of your project to shrink or fade in color.
- Run the washing machine for a short cycle of 10 to 15 minutes. This will give your project enough time to get clean without over-agitating it in the machine.
- Remove your cross-stitch from the mesh bag and lay it flat on a clean towel to air dry. Do not wring or twist your project
Best Detergent For Machine Washing Cross-Stitch: Woolite Delicates Liquid Laundry Detergent
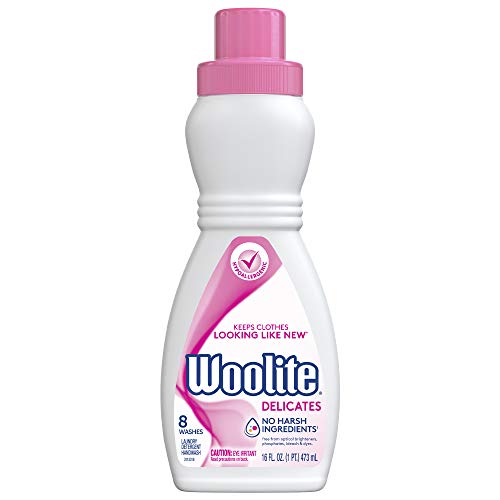
Woolite Delicates is a household name when it comes to washing delicate fabrics. It’s a gentle formula that’s suitable for machine washing cross-stitch. Woolite Delicates is also available in a hypoallergenic option, making it perfect for those with sensitive skin.
Tips For Selecting The Right Washing Cycle And Temperature
While machine washing can be a convenient option for cleaning your cross-stitch project, it’s important to approach this method with caution.
- Always use a delicate or hand wash cycle to prevent the agitation from damaging your cross-stitch project
- Avoid using hot water as it can cause shrinkage and color fading.
- Use a gentle detergent that’s free of bleach and fabric softeners to prevent damage to the fibers.
- Don’t overload the washing machine as it can cause the project to become tangled or snagged on other items.
- Always use a mesh laundry bag to protect your project from snagging or tangling with other items in the washing machine.
- Once the washing cycle is complete, remove the project from the washing machine promptly to prevent mildew or mold from forming.
By following these tips, you can safely clean your cross-stitch project using a washing machine.
Removing Stains From Cross-Stitch Projects
Cross-stitch projects are a labor of love, and the last thing you want is to see a stain on your finished masterpiece. Whether it’s a coffee spill, a smudge from your hands, or any other kind of stain, there are ways to remove it from your cross-stitch project.
Here are some tips on how to clean a stained cross-stitch:
1. Act Quickly
The longer a stain sits on your cross-stitch project, the harder it will be to remove it. So, as soon as you notice a stain, take action to remove it.
2. Blot The Stain
If the stain is still wet, use a clean cloth or paper towel to blot it gently. Avoid rubbing the stain, as this can make it worse.
3. Select A Stain Remover
There are many stain removers available on the market that are safe for use on delicate fabrics. Select an appropriate stain remover and follow the instructions carefully.
4. Test The Stain Remover
Before applying the stain remover to your cross-stitch project, test it on a small, inconspicuous area first to make sure it doesn’t damage the fabric or the threads.
5. Rinse Thoroughly
Once you’ve removed the stain, rinse the fabric thoroughly with cool water to remove any remaining residue from the stain remover.
6. Air Dry
Finally, air dry your cross-stitch project by laying it flat on a clean towel or hanging it up to dry. Avoid using a dryer or exposing the fabric to direct sunlight, as this can damage the threads and cause the colors to fade.
Best Stain Remover For Cross-Stitch: Grandma’s Secret Spot Remover Laundry Spray
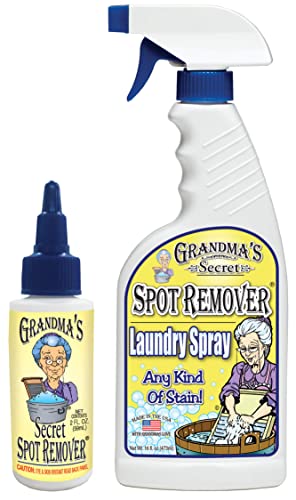
This non-toxic and biodegradable stain remover is safe for all fabrics and colors, including cross-stitch projects. It’s effective at removing a wide range of stains, including oil, grease, and blood.
Storing The Cross-Stitch Project
After cleaning your cross-stitch, it’s important to store it properly to protect it from dust, dirt, and pests.
Here are some tips for storing your project:
1. Store In A Cool, Dry Place
Store your cross-stitch project in a cool, dry place away from direct sunlight and humidity. Avoid storing it in basements, attics, or damp areas as they can attract pests and cause mold growth.
2. Avoid Folding Or Creasing
Fold your cross-stitch project as little as possible to avoid creases and wrinkles. If you must fold it, make sure it’s along a straight line and avoid folding any areas with stitches.
3. Check On It Periodically
Check on your cross-stitch project periodically to make sure it’s still in good condition. If you notice any discoloration, damage, or pests, take necessary actions to prevent further damage. With proper care and storage, your cross-stitch project can be enjoyed for years to come and even passed down to future generations.
Conclusion
Cross-stitching is a beloved hobby for many, but it’s important to take care of your finished projects to ensure they last. By following these cleaning and storage tips, you can preserve the beauty and integrity of your cross-stitch projects.
Remember to always handle your projects with care and use gentle products when cleaning. With a little extra effort, your hard work can continue to bring joy and admiration for years to come.
I hope this post gave you some helpful tips on how to wash cross-stitch. If you enjoyed this post, you might also like the ones below:
RELATED: How To Organize Embroidery Floss (6 Epic Storage Ideas)