Flowers are not just beautiful, they are also one of the most sentimental gifts one can receive. They can be given to express love, appreciation, and condolences.
However, flowers have a lifespan and can wilt and die within a week or two, leaving us with nothing but memories and dried petals. Fortunately, there is a way to preserve flowers and keep their beauty alive for years.
Preserving flowers in a jar is a popular method that has been used for centuries. In this blog post, we will discuss the best types of flowers to use, how to prepare the flowers, choosing the right jar, different methods for preserving flowers, decorating your preserved flowers, and tips for maintaining their appearance over time.
Without further ado, here’s how to preserve flowers in a jar!
I may earn a small commission for purchases made through links in this post at no cost to you. Thank you for supporting Frugal Home Addict! Learn more about my disclaimer policy here.
Preparing the Flowers
Proper preparation is key when it comes to preserving flowers in a jar. Before you begin the preservation process, you’ll need to properly cut and prepare the flowers to ensure they look their best.
Here are some tips for preparing your flowers for preservation:
How to properly cut the flowers
When cutting flowers for preservation, it’s important to use clean, sharp shears to prevent damage to the stems. Dull or dirty shears can crush the stems, making it more difficult for the flowers to absorb water and nutrients.
To ensure a clean cut, hold the stem at a 45-degree angle and cut just above a leaf node or joint. This will ensure that the stem can continue to grow and produce new flowers.

Preparing the stems for preservation
Once you’ve cut the flowers, it’s important to prepare the stems for preservation. Start by removing any leaves or foliage that will be submerged in the water. Leaves and foliage can rot and create bacteria, which can cause the flowers to wilt and die more quickly.
Next, gently scrape the bottom inch of the stem with a sharp knife to remove any dirt or debris that could clog the stem and prevent water absorption.
Tips for removing leaves and thorns
Removing leaves and thorns can be a tricky process, but it’s important to ensure that your preserved flower jar looks its best. Here are some tips for removing leaves and thorns:
- Use gloves: If the flowers you’re working with have thorns, it’s a good idea to wear gloves to protect your hands. You can also use a cloth or towel to grip the stem and avoid getting pricked.
- Remove any damaged leaves or petals: Before you start removing leaves and thorns, take a close look at the flowers and remove any damaged or wilted leaves or petals. This will help ensure that the flowers look their best when preserved.
- Cut away excess foliage: For large, bushy flowers, like hydrangeas or roses, it’s a good idea to remove some of the excess foliage to allow the flowers to stand out more. Use sharp shears to carefully cut away any leaves or stems that will be submerged in the water.
- Be gentle: When removing leaves and thorns, it’s important to be gentle with the flowers. Avoid pulling too hard on the stem or breaking any delicate petals. Use a small pair of scissors or a sharp knife to carefully remove any unwanted leaves or thorns.
- Consider leaving some foliage: While it’s important to remove any foliage that will be submerged in the water, you may want to consider leaving some foliage near the top of the stem. This can add visual interest to your preserved flower jar and make the flowers look more natural. Just be sure to remove any leaves or stems that will be submerged in the water to prevent bacteria growth.
Overall, preparing your flowers for preservation requires attention to detail and a gentle touch. By following these tips for cutting, preparing, and removing leaves and thorns, you can ensure that your preserved flower jar looks beautiful and lasts as long as possible.
Choosing the Right Jar
To preserve flowers in a jar, it’s crucial to use a suitable container that can hold the flowers in water without causing any damage. The type of jar you choose can affect the longevity of your preserved flowers and the overall visual appeal of your project.
Here are some tips for choosing the right jar for your preserved flower project.
The Best Types of Jars for Preserving Flowers
When it comes to selecting a jar for preserving flowers, there are several types to choose from. Here are some of the best options:
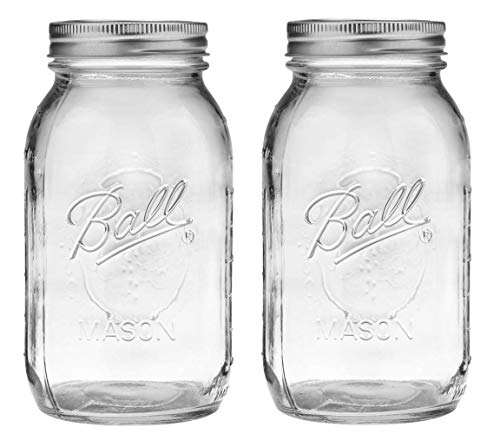
1. Mason jars
Mason jars are a popular choice for preserving flowers due to their durability, clear glass, and wide opening. They come in a variety of sizes and can be easily found at most craft stores or online.
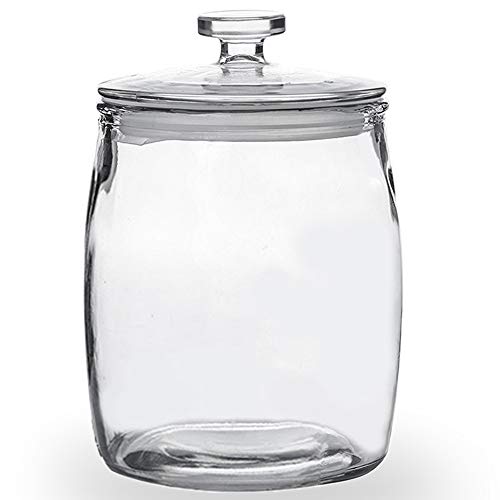
2. Apothecary jars
Apothecary jars have a vintage look that can add a touch of elegance to your preserved flower project. They come in a variety of shapes and sizes and can be found at home decor or craft stores.
3. Vintage bottles
If you’re going for a rustic or vintage look, consider using vintage or vintage-inspired bottles for your preserved flower project. These can be found at antique stores or flea markets and can add a unique touch to your project.

Tips for Selecting the Right Jar for Your Project
When selecting a jar for your preserved flower project, there are a few things you should consider to ensure the best results. Here are some tips to keep in mind:
- Size: Consider the size of your flowers and the number of stems you want to include in your preserved flower jar. Choose a jar that is large enough to accommodate your flowers without crowding them.
- Shape: The shape of your jar can affect the overall look of your preserved flower jar. Consider the style and theme of your project when selecting a jar shape. For example, a vintage bottle may be more appropriate for a rustic or shabby chic project, while a modern apothecary jar may work better for a contemporary project.
- Material: The material of your jar can also affect the visual appeal of your preserved flower jar. Clear glass jars are the most popular choice, as they allow the flowers to be visible and provide a clean and simple look. However, if you want to add some color or texture, consider using a colored or textured jar.
- Lid: Consider whether you want a jar with a lid or an open jar. If you’re using fresh flowers, a lid can help keep them moist and protected. However, if you’re using dried flowers, an open jar may be more appropriate to allow for air circulation.
- Accessibility: Consider how easy it will be to add and remove flowers from your jar. A wide-mouthed jar like a Mason jar will make it easier to arrange your flowers, while a narrow-necked bottle may make it more difficult.
How to Properly Clean and Sterilize the Jar
Before using your jar for preserving flowers, it’s important to properly clean and sterilize it to prevent the growth of bacteria and mold that can damage your flowers.
Here’s how to clean and sterilize your jar:
- Wash the jar thoroughly with soap and water, making sure to remove any dirt or debris.
- Rinse the jar with hot water to remove any remaining soap residue.
- Fill the jar with boiling water and let it sit for at least 5 minutes.
- Pour out the boiling water and let the jar air dry completely before using it for your preserved flower project.
How to Preserve Flowers in a Jar
Preserving flowers in a jar is a great way to enjoy their beauty for a longer period of time. There are several methods for preserving flowers in a jar, each with its own advantages and disadvantages.
In this section, we will discuss the different methods for preserving flowers in a jar, provide a step-by-step guide for each method, and offer tips for ensuring your flowers are properly preserved.
Here’s how to preserve a flower in a jar:
1. Air-Drying Method
The air-drying method is a simple and effective way to preserve flowers in a jar. Here’s how to do it:
- Select the flowers you want to preserve. Choose flowers that are in good condition and have not yet begun to wilt.
- Remove any leaves or foliage from the stems of the flowers.
- Tie the stems of the flowers together with string.
- Hang the flowers upside down in a cool, dry place. Make sure the flowers are not touching each other.
- Leave the flowers to dry for several weeks. The drying time will depend on the type of flowers you are preserving.
- Once the flowers are completely dry, remove them from the hanging position and place them in a clean, dry jar.
- Store the jar in a cool, dry place away from direct sunlight to help preserve the flowers for as long as possible.
2. Pressing Method
The pressing method is another popular way to preserve flowers in a jar. This method involves pressing the flowers between sheets of paper to remove their moisture. Here’s how to do it:
- Select the flowers you want to preserve. Choose flowers that are in good condition and have not yet begun to wilt.
- Place the flowers between two sheets of paper, such as newspaper.
- Place the paper with the flowers between the pages of a heavy book.
- Stack several heavy books on top of the first book to apply pressure to the flowers.
- Leave the flowers to press for several weeks. The pressing time will depend on the type of flowers you are preserving.
- Once the flowers are completely dry, carefully remove them from the paper and place them in a clean, dry jar.
- Store the jar in a cool, dry place away from direct sunlight to help preserve the flowers for as long as possible.
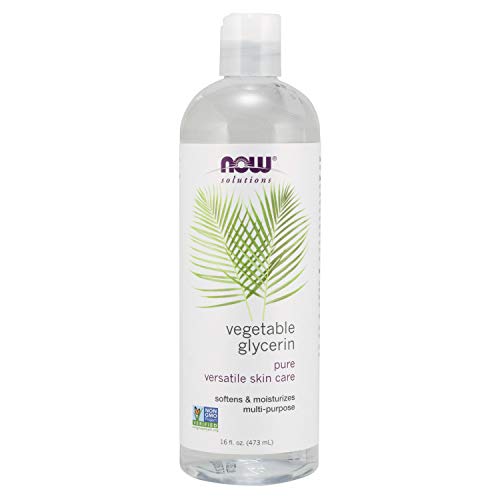
3. Glycerin Method
The glycerin method is a bit more involved than the air-drying or pressing methods, but it can produce beautiful, long-lasting results. This method involves replacing the water in the flowers with a mixture of glycerin and water. Here’s how to do it:
- Mix a solution of one part glycerin to two parts lukewarm water in a container.
- Select the flowers you want to preserve. Choose flowers that are in good condition and have not yet begun to wilt.
- Cut the stems of the flowers to the desired length and remove any leaves or foliage from the lower part of the stems.
- Place the flowers in the glycerin solution, making sure they are completely submerged.
- Leave the flowers in the solution for several days to several weeks, depending on the type of flowers you are preserving.
- Once the flowers have absorbed the glycerin solution and become pliable, remove them from the solution.
- Hang the flowers upside down in a well-ventilated area to dry.
- Once the flowers are completely dry, arrange them in a clean, dry jar.
- Store the jar in a cool, dry place away from direct sunlight to help preserve the flowers for as long as possible.
Decorating Your Preserved Flowers
Once you have preserved your flowers, it’s time to think about how to display them in your home. There are many creative ways to decorate your preserved flowers, and with a little imagination, you can create a beautiful and unique centerpiece that will add a touch of elegance to any room.
Here are some ideas to get you started:
How to display your preserved flowers in a jar
One of the simplest and most popular ways to display preserved flowers is to place them in a glass jar. The clear glass allows you to see the flowers from all angles and creates a beautiful, natural display.
Here are some tips for displaying your preserved flowers in a jar:
- Choose a jar that complements the style of your home. If you have a modern home, choose a clean, simple jar with a minimalist design. If you have a more traditional home, opt for a jar with a classic, elegant shape.
- Use a variety of flower sizes and colors to create a dynamic display. Mix and match different types of flowers to create a unique arrangement that reflects your personal style.
- Consider adding other elements to your display, such as rocks, sand, or seashells. These elements can add texture and interest to your arrangement and help to anchor the flowers in place.
- Experiment with different heights and levels by placing some flowers at the bottom of the jar and others at the top. This will create a more dynamic and interesting display
Tips for maintaining the appearance of your preserved flowers over time
In this post, I’ve gathered the best methods on how to preserve flowers in a jar. Preserved flowers can last for several months or even years with proper care.
Here are some tips to help you maintain the appearance of your preserved flowers over time:
- Keep them out of direct sunlight: Preserved flowers are sensitive to light, so it’s important to keep them out of direct sunlight to prevent them from fading.
- Avoid moisture: Preserved flowers can absorb moisture, which can cause them to wilt or decay over time. Keep them in a dry, cool place to prevent moisture from accumulating.
- Handle with care: Preserved flowers are delicate and can easily be damaged if handled roughly. When moving or rearranging them, be gentle and use caution.
- Dust them regularly: Over time, dust can accumulate on your preserved flowers, which can dull their appearance. Use a soft brush or a can of compressed air to gently remove any dust that has accumulated on your flowers.
- Store them properly: If you need to store your preserved flowers for an extended period of time, make sure to store them in a dry, cool place away from direct sunlight. You can also wrap them in tissue paper or bubble wrap to help protect them from damage.
By following these tips, you can help ensure that your preserved flowers stay beautiful and vibrant for months or even years to come.
Conclusion
In conclusion, preserving flowers in a jar is a beautiful way to extend the life of your favorite blooms and create a stunning decoration for your home or office.
With the right care and attention, your preserved flowers can last for months or even years, bringing joy and beauty to your space for a long time. So go ahead and experiment with different types of flowers and jars, and enjoy the beauty of your preserved blooms!
I hope this post gave you some helpful tips on how to preserve a flower in a jar. Good luck!