EVA foam has taken the crafting and cosplay world by storm, becoming an incredibly popular material due to its affordability, versatility, and ease of use. Whether you’re creating intricate costumes or crafting props, EVA foam provides endless possibilities.
In this post, we will explore the importance of proper painting techniques and guide you through the process step by step. By the end, you’ll be equipped with the knowledge and skills to transform plain EVA foam into stunning works of art. Without further ado, here’s how to paint EVA foam!
I may earn a small commission for purchases made through links in this post at no cost to you. Thank you for supporting Frugal Home Addict! Learn more about my disclaimer policy here.
What is EVA Foam?
EVA foam is a lightweight, flexible, and affordable material that has gained immense popularity in the crafting and cosplay communities. It is commonly used for creating costumes, props, and various craft projects. The closed-cell structure of EVA foam makes it an ideal surface for painting, as it provides a smooth and even base for applying colors and designs.
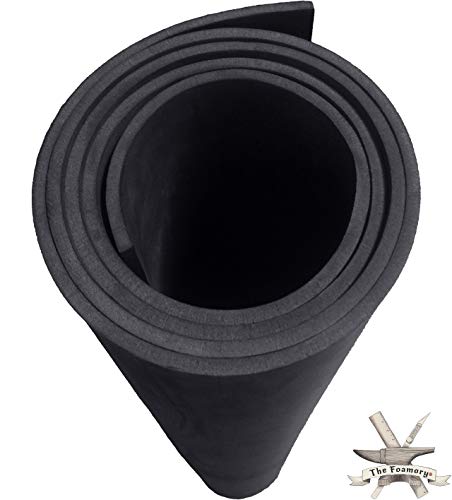
We highly recommend EVA Foam from The Foamory Store. The ultra-high density of the foam sheets enhances their durability and longevity. It can withstand regular wear and tear, making it suitable for long-term use in cosplay costumes and props.
Preparing EVA Foam for Painting
Before you start painting, it’s essential to properly prepare the surface of the EVA foam. This involves a few key steps to ensure the best possible paint adhesion and a smooth finish.
A. Cleaning and Priming the Surface
Begin by thoroughly cleaning the EVA foam surface to remove any dirt, oils, or debris. This can be done using a mild detergent and water, or a gentle cleaning solution. Once clean, allow the foam to dry completely.
Next, apply a primer specifically designed for EVA foam. Priming serves two purposes: it enhances paint adhesion and creates a barrier between the foam and the paint, preventing the paint from being absorbed into the foam. Apply the primer in thin, even coats, following the manufacturer’s instructions. Allow each coat to dry before applying the next.
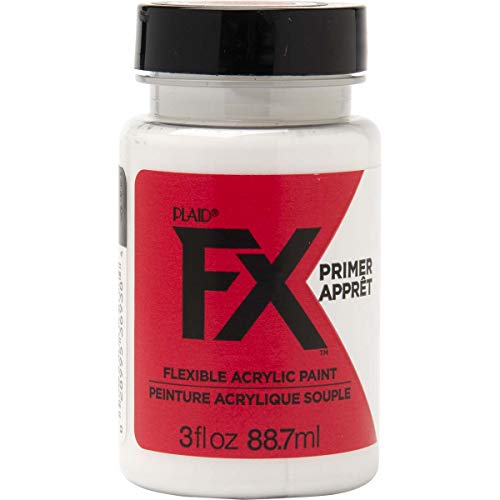
PlaidFX Paint Primer is considered the best primer for EVA foam due to its specific formulation for porous surfaces, excellent coverage, flexibility, quick-drying properties, and color options. It effectively bonds to the foam, providing a solid base for paint application and filling in imperfections. The primer remains intact even when the foam is bent or manipulated, and its quick-drying feature saves time and reduces the risk of smudging.
B. Sanding and Smoothing Imperfections
After priming, it’s time to address any imperfections on the EVA foam surface. Use a fine-grit sandpaper to gently sand down any rough edges, visible seams, or uneven surfaces. Sanding helps to create a smoother canvas for painting and ensures that your final finish will be flawless. For best results, we recommend 3M’s 180 Grit Sandpaper.

Remember to take your time and be gentle during the sanding process to avoid damaging the foam. Once you’re satisfied with the smoothness, wipe away any dust or debris with a clean cloth or sponge.
Essential Tools and Materials for Painting EVA Foam
Now that we have a good understanding of EVA foam and its painting properties, let’s explore the essential tools and materials you’ll need to achieve fantastic results when painting your EVA foam projects.
A. Necessary Tools for Painting EVA Foam
- Paintbrushes: Invest in a variety of paintbrushes, including flat and round brushes of different sizes. These brushes will help you achieve different effects and cover both large and small areas.
- Foam Brushes: Foam brushes are great for applying base coats and larger areas of color. They provide a smooth finish and minimize brush strokes.
- Airbrush: If you want to achieve more detailed and smooth finishes, consider using an airbrush. It allows for precise control and can create realistic shading and gradients.
- Heat Gun: A heat gun is a useful tool for shaping and molding EVA foam. It can also help set paint and sealants, ensuring a more durable finish.
- Sandpaper: Keep a selection of sandpaper with different grits on hand. They will come in handy for smoothing out imperfections and achieving a polished surface.
- Cutting Tools: Depending on your project, you may need a utility knife, scissors, or a hot knife for cutting and shaping the foam.
B. Best Paints for EVA Foam
- Acrylic Paints: Acrylic paints are a popular choice for painting EVA foam. They are readily available, come in a wide range of colors, and provide good coverage. Acrylic paints dry quickly and can be easily diluted or mixed to create custom shades. We recommend using acrylic paints formulated specifically for EVA foam like this one from PlaidEX.
- Spray Paints: Spray paints are convenient for covering large areas quickly. They provide an even coat and are available in various finishes, such as matte, satin, or glossy. When using spray paint, be sure to work in a well-ventilated area.
- Plasti Dip: Plasti Dip is a rubber coating that can be sprayed or brushed onto EVA foam. It provides a protective layer that enhances durability and flexibility. Plasti Dip is available in a variety of colors and finishes.

When choosing the best paint for EVA foam, consider the desired finish, flexibility requirements, and durability. Always test the paint on a small, inconspicuous area of the foam before applying it to your entire project.

Step-by-Step Guide: How to Paint EVA Foam
Painting EVA foam can be a fun and creative process that brings your projects to life. Here’s a step-by-step guide on how to paint EVA foam:
Step 1: Choosing a Design and Planning the Paint Scheme
Before you begin painting, take some time to think about the design and color scheme you want to achieve. Consider the character, object, or theme you’re working with and how you can best bring it to life on your EVA foam project. Sketching out your design or creating a mood board can help you visualize the final result.
Step 2: Applying the Base Coat
Start by applying a base coat to your EVA foam. This will provide a solid foundation for the rest of your paint layers. Use a foam brush, paintbrush, or spray paint to cover the entire surface evenly. Allow the base coat to dry completely before moving on to the next step.
Step 3: Adding Details and Highlights
Once the base coat is dry, it’s time to add details and highlights to your EVA foam project. Use smaller brushes or an airbrush to carefully apply different colors and shades. This is where your design and planning come into play. Take your time and work in layers, allowing each layer to dry before adding the next. Building up the details gradually will result in a more realistic and professional-looking finish.
Step 4: Sealing and Protecting the Painted Surface
After you’ve completed all the desired details and highlights, it’s crucial to seal and protect the painted surface. This will ensure the longevity and durability of your paint job. There are several options for sealing EVA foam, depending on the finish you desire.
One popular choice is using a clear sealant or varnish. Apply the sealant in thin, even coats, following the manufacturer’s instructions. This will protect the paint from wear and tear, moisture, and UV damage. We recommend Krylon’s UV-Resistant Matte Spray Paint.

Another option is using a heat gun to seal the paint. Gently heat the painted surface from a distance until the paint becomes slightly shiny. Be careful not to overheat or scorch the foam. This method helps to set the paint and provides a protective layer.
Remember, sealing the foam is essential to prevent the paint from cracking, peeling, or getting absorbed into the foam. It also makes the surface easier to clean and maintain.
Troubleshooting Common Painting Issues
Painting can be a rewarding and creative process, but it’s not without its challenges. In this section, we’ll explore some common painting issues that you may encounter and provide solutions to help you overcome them.
A. Addressing Paint Adhesion Problems
One frustrating issue that painters often face is poor paint adhesion. If you find that your paint isn’t sticking well to the surface, there are a few steps you can take to improve adhesion.
First, make sure the surface is clean and free from any dust, dirt, or oils. Wipe it down with a damp cloth or use a mild soap and water solution to remove any contaminants. Additionally, consider using a primer specifically designed for EVA foam. Primers create a bond between the surface and the paint, ensuring better adhesion.
B. Dealing with Paint Cracking or Peeling
Paint cracking or peeling can be disheartening, especially after putting in the time and effort to complete a project. To prevent these issues, it’s important to choose the right type of paint for your project. Some paints are more flexible and suitable for certain surfaces than others.
Acrylic paints are a popular choice for their flexibility and durability. Additionally, ensure that you are applying thin, even coats of paint. Thick layers of paint can dry unevenly and lead to cracking or peeling. If you notice any cracks or peeling, gently sand the affected area, apply a primer if necessary, and repaint.
C. Fixing Uneven Paint Coverage
Uneven paint coverage can be a result of various factors, such as improper application techniques or using low-quality paints. To fix this issue, start by assessing the surface. If there are any bumps, ridges, or imperfections, sand them down gently to create a smoother surface. Next, apply thin, even coats of paint, allowing each coat to dry before applying the next.
If you notice any areas with uneven coverage, you can try adding additional coats of paint to even it out. Sanding lightly between coats can also help achieve a smoother and more uniform finish.
Tips for Maintaining and Caring for Painted EVA Foam
Once you’ve completed your painting project on EVA foam, it’s important to take proper care of it to ensure its longevity and keep it looking its best. In this section, we’ll explore some essential tips for maintaining and caring for your painted EVA foam creations.
A. Proper Storage and Handling
When it comes to storing your painted EVA foam items, it’s crucial to find a suitable environment. Ideally, choose a cool and dry place that is away from direct sunlight. Extreme heat and humidity can cause the paint to deteriorate or fade over time. If possible, store your foam creations in a dust-free area or cover them with a cloth or plastic wrap to protect them from accumulating dust and dirt.
It’s also essential to handle your painted EVA foam items with care. Avoid gripping or squeezing them too tightly, as this can lead to paint cracking or peeling. Treat your creations delicately to ensure their longevity.
B. Cleaning and Preserving the Painted Surface
To keep your painted EVA foam items looking fresh and vibrant, it’s important to clean and preserve the painted surface. Start by using a soft, damp cloth or sponge to gently wipe away any dust or dirt that may have accumulated. Avoid using harsh chemicals or abrasive cleaners, as they can damage the paint. If needed, you can use a mild soap and water solution, but be sure to rinse thoroughly and dry the surface completely afterward.
In addition to regular cleaning, you may also consider applying a clear protective sealant to help preserve the paint and protect it from wear and tear. Be sure to follow the manufacturer’s instructions when applying any sealant.
Conclusion
This post has provided a comprehensive guide on how to paint EVA foam effectively. We discussed the importance of proper surface preparation, including cleaning and priming, to ensure paint adhesion. We also explored various techniques to address common painting issues such as cracking, peeling, and uneven coverage. Additionally, we highlighted the significance of using the best paints for optimal results, considering factors like flexibility and durability.
Armed with these insights, you are now equipped to unleash your creativity and bring your EVA foam projects to life with confidence. So grab your brushes, choose your colors, and let your imagination soar as you embark on this exciting journey of EVA foam painting. Happy crafting!